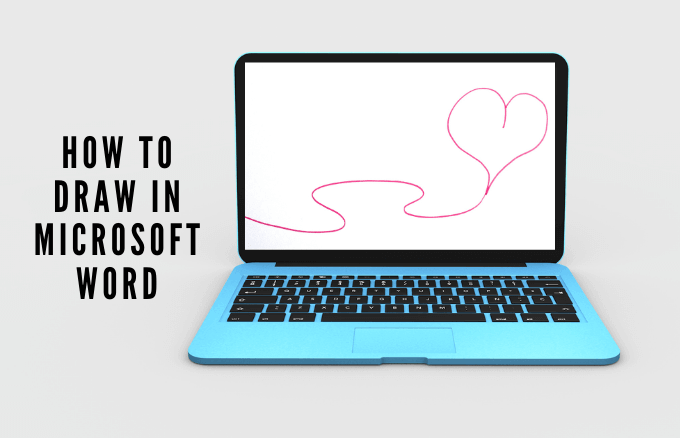
How to Draw a Circle in Word 2011
While Microsoft Give-and-take may non be the first drawing tool you think of, its drawing tools are among its little-known features that are simple to larn and like shooting fish in a barrel to use.
These drawing tools come in diverse shapes and forms including arrows, banners, callouts, squares, circles, stars, and flowchart shapes you can use to create images or illustrations.
If you're looking for the correct prototype or clip art to add to your document, and yous can't find the exact i you want, you lot can draw it in Word using the cartoon tools.
Whether you're doodling, taking visual notes, or sketchnotes, here's how to depict in Microsoft Word then you can add some personality to your projection.
How to Draw in Microsoft Give-and-take
There are several types of drawings you lot can create in Word including bones lines and shapes, freeform shapes, and more. Let'southward learn how to draw in Word using the predefined shapes and drawing tools available.
The screenshots are from Microsoft Word for macOS. Windows users tin also follow the aforementioned steps.
How to Draw Bones Lines and Shapes in Word
If you want to depict unproblematic shapes in your certificate, Word offers several shapes.
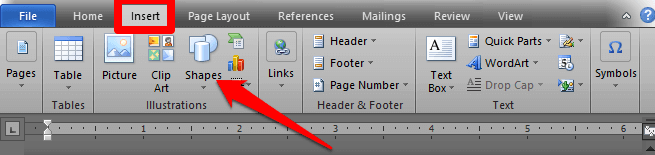
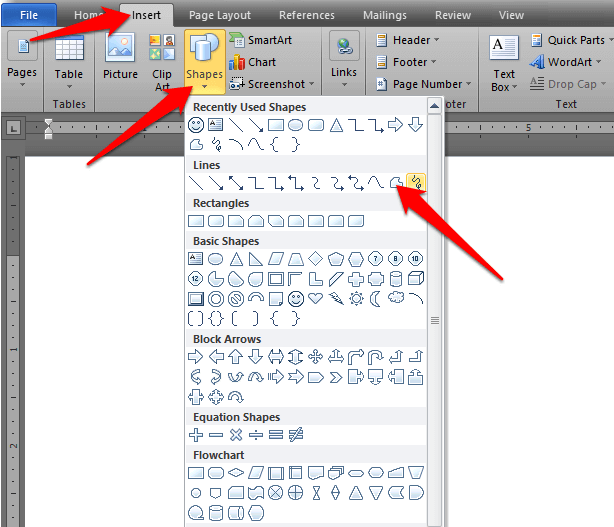
- To draw basic lines and shapes, open your Discussion document. Select Insert > Shapes from the toolbar.
- Select the shape you'd like to draw, starting time and elevate it to the ending point on the location y'all'd like it to place the shape in your document. Yous can select the shape'south sizing handles and elevate them to modify its size, and and then release once you get the desired size.
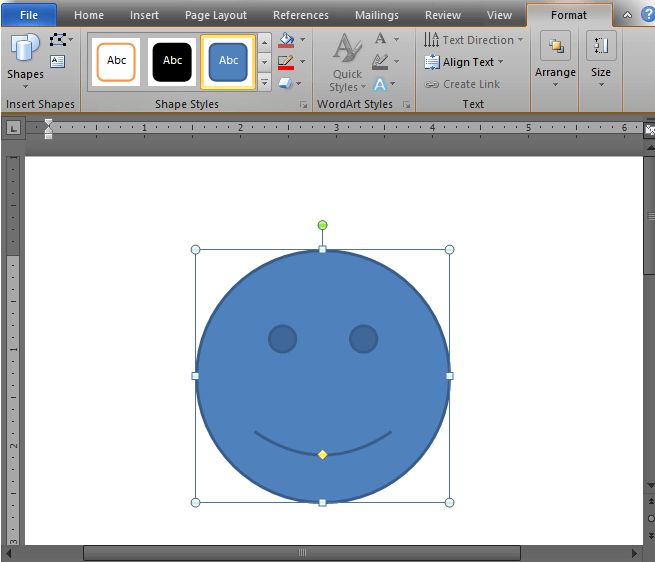
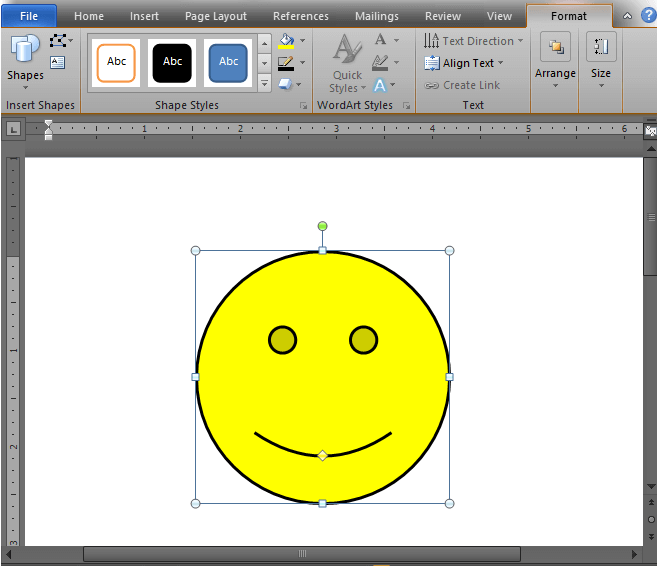
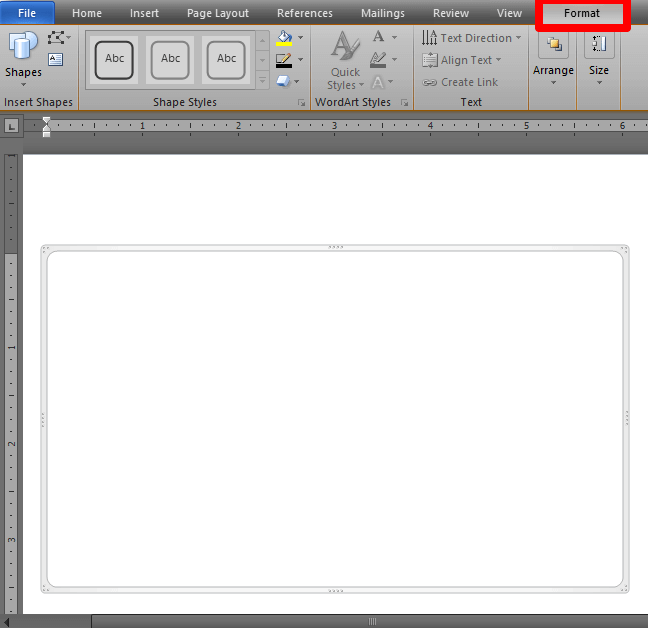
If you want, you can format the shape by opening the Drawing Tools Format tab. This tab offers various options that allow you to modify the color, look, and style of the shape you add together to your document.
- To change the look and colour of a shape, select the shape to open the Format tab from where you tin can play with color furnishings or edit the line type of the shape's outline and more than.
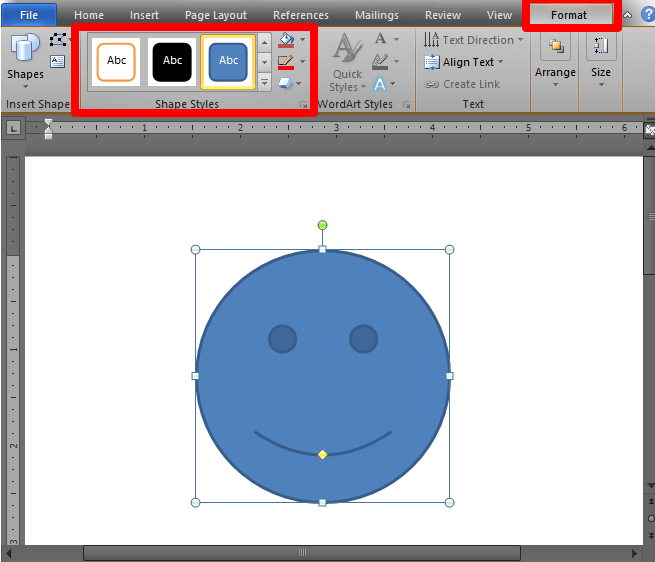
- From the Format tab, you can select a predefined mode, change the shape's color past selecting Shape Fill or alter the outline colour using the Shape Outline choice. Yous can likewise use the Shape Furnishings option to add together shadows and other effects or select the shape and enter text in it.
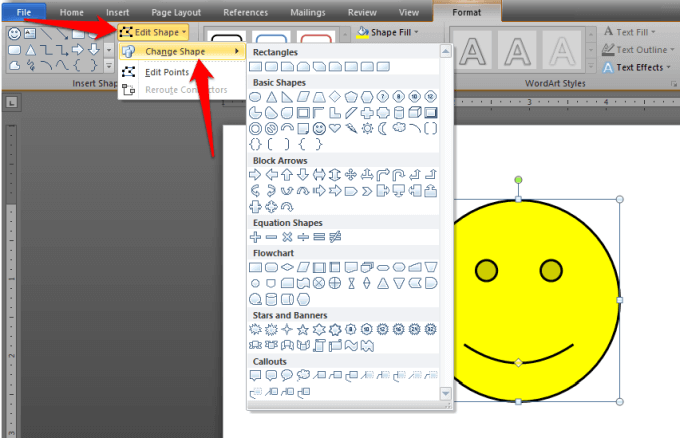
- If yous want to switch to a different shape, for example square to circle, select Format > Edit Shape > Change Shape and select your preferred shape.
How to Create a Freeform Drawing in Discussion
If in that location's a item shape you want and you can't find it in the predefined shapes, you can draw it yourself using the Freeform shapes. There are two ways to create freestyle shapes using a mouse or trackpad:
- Using Freeform: Scribbles for manus-drawn shapes
- Using Freeform: Shape for shapes with straight or curved segments
To create a freeform cartoon using Scribbles:
- Select Insert > Shapes > Freeform: Scribble.

- Side by side, select the surface area where you'd like to depict your freestyle shape and then drag anywhere to draw it.
To depict freestyle shapes:
- Select Insert > Shapes > Freeform: Shape.
- Create the curves or straight line segments as you want by selecting the starting bespeak and dragging to the end indicate. Echo the process if yous want to draw a serial of straight lines or curve segments.
Notation: If y'all discover information technology difficult to draw freeform shapes in Word, you can try drawing in Microsoft Paint and insert the image into Give-and-take afterward on.
How to Draw in Discussion Using the Drawing Canvas
If you need to group your shapes together, yous tin can create a drawing canvas and add together the shapes into information technology.
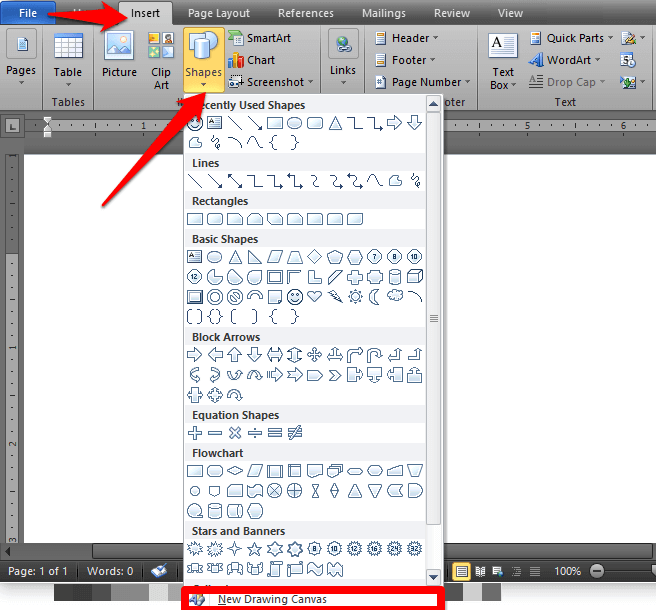
- To create a cartoon canvass, select Insert > Shapes > New Drawing Canvas.
- Next, motion the cartoon canvas where yous want in your certificate and your shapes will move with the sail. Y'all can drag the sizing handles to resize the canvass, and select Format to give the canvas a fill color or outline shape.
Notation: While you lot don't necessarily need a cartoon sail when working with drawing objects in Word, you can apply it as an organizational aid to add connectors betwixt shapes or to work with several drawing objects.
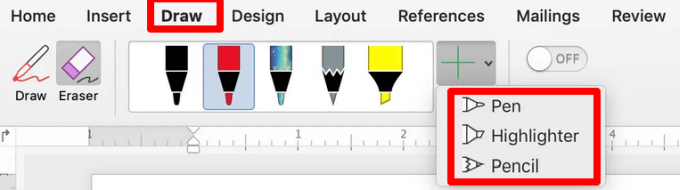
How to Describe in Word Using Pen Tools
If you want to depict more than complex shapes, Microsoft Word pen tools allow you to do that instead of using the basic lines or freeform shapes.
- To draw with Discussion pen tools, select Describe and then choose Pen, Pencil or Highlighter.
- Using your mouse, click, hold and drag to create the shape and add the elements you want. In one case done, select the Describe button again.
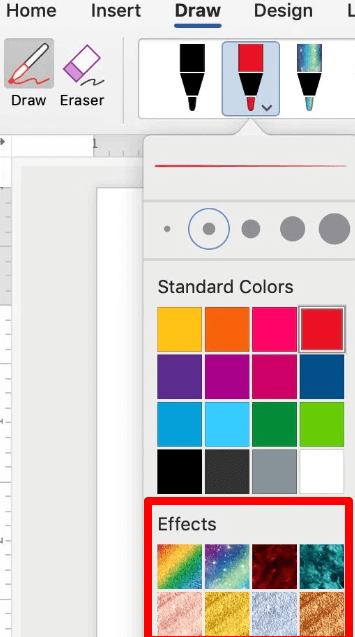
- Select the driblet-downward menu to change the tool's color or thickness and select what y'all want. You tin also select More than Colors to access many more colors besides the 16 standard colors available.
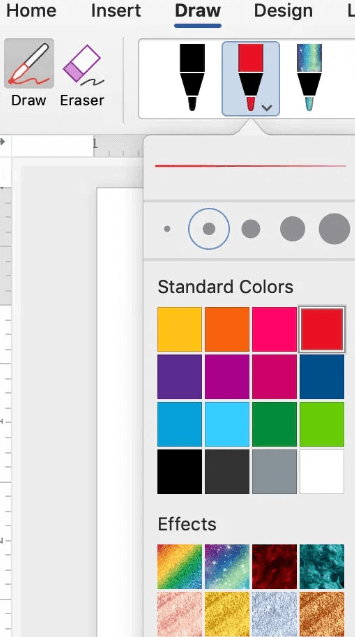
- You can likewise add special effects including rainbow, lava, galaxy, ocean, golden, rose gold, silvery and bronze.
How to Erase Your Drawing in Word
Give-and-take offers an Eraser tool in its Drawing tools card to erase any mistakes in your drawings. The eraser tool has 3 types:
- Small eraser to erase a minor area
- Stroke eraser to erase the whole stroke
- Medium eraser to erase a larger area
To erase a small or large expanse, click, hold and drag your mouse over the area you want to delete. If you desire to delete a line, select the Stroke eraser and click on the line to erase it.
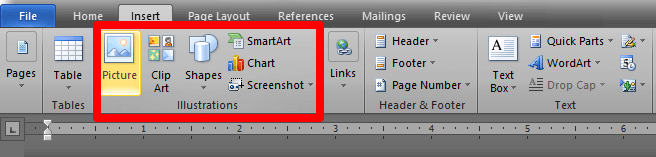
How to Add a Drawing to a Word Document
If you want to enhance your Word document, you can add a drawing instead of using basic lines and shapes, or freeform shapes.
You tin add SmartArt, pictures, charts, prune art or drawing objects like WordArt, flowcharts, diagrams and more. These cartoon objects are role of Word, and you tin raise or change them with patterns, colors, borders and other effects.
- To add a drawing in Word, select the area where you want to create the drawing in your certificate. Select Insert > Shapes and select SmartArt, Motion-picture show, Clip Fine art, Chart or Screenshot.
- In the Format tab, yous tin change the shape, add text to the shape, or group selected shapes. Y'all can also describe using the Freeform or Scribble options.
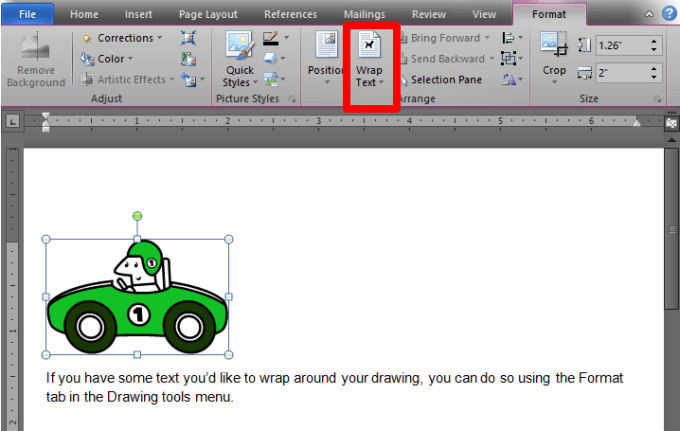
How to Format the Text Wrapping Around a Cartoon
If you have some text you'd like to wrap effectually your cartoon, you can do and then using the Format tab in the Cartoon tools card.
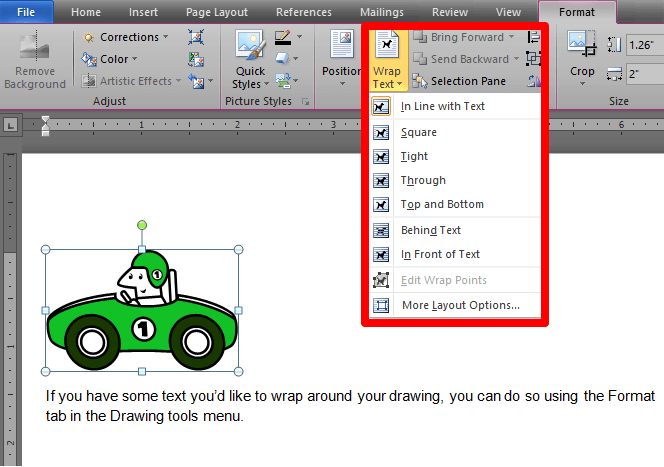
- To wrap text around your drawing, select the cartoon and then select Wrap Text in the Format tab.
- Side by side, select a text wrapping option: Square, In line with text, Through, Tight, Acme and Bottom, Backside text, or In front of text.
- If your drawing has an irregular shape, you can wrap text around it by going to Shape Format> Arrange > Wrap Text and select Edit Wrap Points.
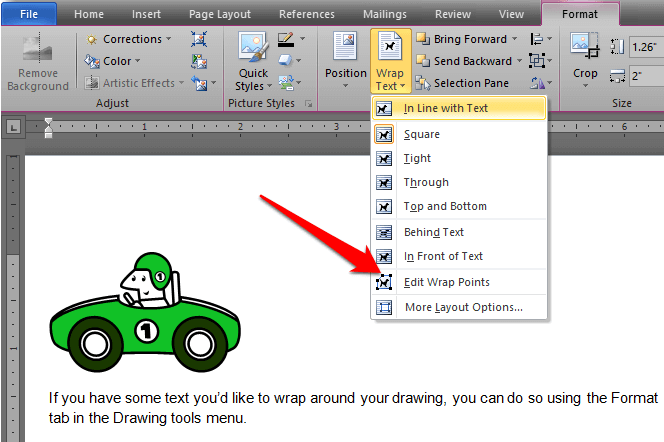
Modify the boundary by selecting and dragging the boundary points. This too allows you to control how the text wraps around the cartoon.
Another way to add drawings to a Word document is past using premium graphic images. Yous can access thousands of Word templates from the Elements marketplace or GraphicRiver, which are professionally designed for maximum impact.
Put Your Artistry to the Examination
Whether y'all apply a mouse, trackpad, touchscreen or digital pen, the cartoon tools in Discussion can help you create shapes, add notes, edit text and more.
Combine your drawings with cute fonts in Discussion and create documents that catch the eye of readers.
Do not share my Personal Information.
Source: https://helpdeskgeek.com/office-tips/how-to-draw-in-microsoft-word/
0 Response to "How to Draw a Circle in Word 2011"
Post a Comment